Saturday 31 December 2011

croissant and pains au chocolat


Something I have wanted to make for years, but was put off by thinking it would be hard, was croissants. The shop bought ones can be OK but none ever quite hit perfection of sitting in a french cafe eating still warm from the oven croissants and pains au chocolat.  This year I vowed to make my own or at least try to do so. For some reason I kept putting it off then realised yesterday if I was going to keep the vow it needed to be started last night as the dough needed refrigerating overnight.  So I grabbed the last book I remembered seeing the recipe in The Primrose Bakery book I had recently bought.  Slight difference was the butter was cut into small cubes and not rolled out flat and inserted and folded between layers but this way worked out just as we. I learnt to make puff pastry at school so none of this was to alien to me. Thankfully it all worked.

This takes not a lot of time really BUT does need to be in fridge overnight and proving time after it comes to room temp the following day.  So although it takes a long time it is mostly resting and proving

To start with you will need
 300 ml hand hot water
1 1/2 teaspoons dried yeast
500g strong white bread flour, plus more for rolling
45g granulated sugar
2 teaspoons salt
20 g skimmed milk powder
250g unsalted butter, preferably straight from fridge (I know this is a lot of butter and please use butter, but it's what makes these so good so don't skimp or wimp out please, butter or don't bother.  you have been warned)

For the pains au chocolat you will also need around 40 g of dark decent chocolate.

plus an egg for the egg wash

This will make you roughly 6 croissant and 4 pains au chocolat

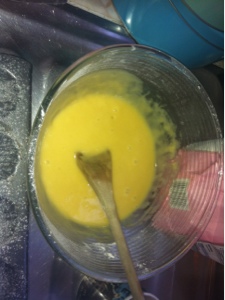
So lets get started.  measure your water out and stir in the yeast, it should froth up sort of and go kind of foamy. If you do this first it should be ready by the time you have weighed out the other ingredients and mixed them up and look a little like this

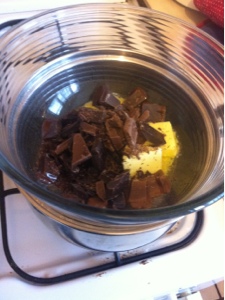
Thrilling huh? next you will need to find yourself a largish bowl and sieve all the dry ingredients into the bowl. stir this together to mix a bit and take your glorious block of butter and cut it into smallish lumps.  and stir into your flour mixture, but do not beat just stir until coated and combined.  You should still see the lumps just coated in flour. 

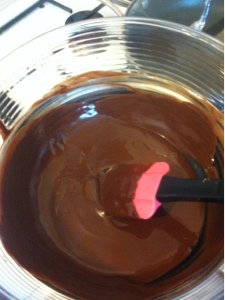
Next is pretty easy is pour in your yeast water and stir with a spoon until combined all together.  I squished it a little and it became a rough shaggy lump that looked a bit dubious.
Then I wrapped it in cling film in both directions for good measure.  Not to tightly though as even though it was going in the fridge it will still expand slowly as the dough proves/rises so it went in looking like this

And came out the next morning probably looking no different to you but filled out the clingfilm to almost bursting proportions

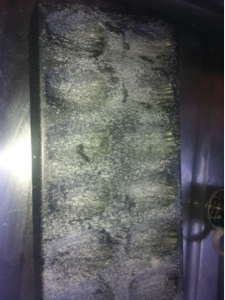
Next stages involved a fair bit of rolling but nothing difficult. I rolled this out on a floured board to a rough big rectangle and folded it up like a letter would be to fit in an envelope 
last one very blurry sorry, then turn it round 90 degrees and roll out to another largish rectangle and repeat the process 3 times more.  I noticed the dough became smoother and silkier almost as I kept this up. This step is important as it forms the layers that make croissants flaky and delicate. 

Now I did something really stupid next and while I went off in hunt of a tape measure and concentrated on rolling out to the right dimensions and cut out the right shapes I forgot to take pictures :o( So will try to explain best I can. I needed to ditch my board and roll out straight on kitchen counter as board wasn't big enough.  I also found it was easier to cut the dough cleanly with a pizza wheel using my rolling pin as a guide to cut against for a straight even cut.

So roll out the dough on floured surface into a rectangle measuring 48X38 cm. with the long side facing you measure along to 30 cm and cut into 2 pieces.  The smaller piece can then be cut evenly into 4 small rectangles and filled with around 10g of chocolate and rolled from one short end to the other and placed on a baking try lined with baking paper.  

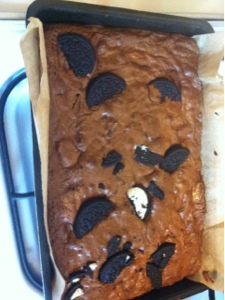
The bigger piece of dough that is left needs to be cut evenly into 3 long rectangles and then each rectangle cut diagonally ( made me think of Harry Potter there) to form 6 long thin triangles.   Roll these from wide end of triangle and place on baking tray with pain au chocolat. I covered 3 of the croissant and froze for another day at this point and was left with a tray of deliciousness like this 


I covered loosely with clingfilm and left to rise and double in size for about an hour and preheated oven to 200 degrees C or gas mark 6.
Gave them a simple egg wash with a beaten egg and cooked for 30 minutes.  The smell in last 10 minutes took me right back to that cafe in France. In last 10 minutes I dragged older son out of bed and made tea and real coffee to sit and enjoy these warm from the oven

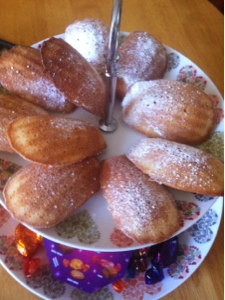
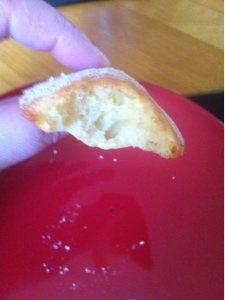
They were amazing.  will leave you with a few pics of insides and close up.  It was an interesting dough when cooked, was sweet and savoury but wasn't either and  so crisp on outside but melting tender layers within. Definitely worth the effort and all those calories in butter.  I would rather have these once or twice a year than manufactured for supermarket ones. 

 First up inside of the first croissant.
can you see all those amazing layers? yummm
flash blurred this a bit I feel sorry but melted just warm chocolate in pain au chocolat

Thursday 8 December 2011

Oreo brownies


Some days just suck, and I find best way to chill out and calm down is to bake, unfortunately right now I don't have what I need exactly to bake or the time but if I was baking it would be these.  So in hope of calming down before going to try and finish my Christmas shopping I thought this blog post while I was drinking my coffee might help.  This recipe has evolved along the way, not exactly sure where it came from as it's written on a bit of paper, that I even remembered to write recipe title on the top of.  #Which is rare, often I sit there wondering what some of these recipes actually are supposed to make lol  I saw the lovely Lorraine pascale make oreo cookies so added some to this recipe and :oD happy bunny here.  I do remember converting this from cups etc and weighing ingredients so may seem odd amount but they work for me 

72 g butter
100g  dark choc
50g milk choc
150 g white sugar
2 large eggs
1 tsp vanilla extract
1/4 tsp salt
70g plain flour
I packet of oreo cookies

ok to start oven at gas mark 3 or 325 and centre a shelf in oven. 
Line your brownie pan with baking paper or buttered/greased foil 

put the chocolate and butter in a bowl over simmering pan of water until melted, don't let the water boil and make sure the bowl doesn't come into contact with the water. 


 Stir occasionally and it should end up looking glorious silky and smooth, when it looks like picture below remove the bowl from the saucepan, being very very careful, that bowl is hot!


Which you will then wreck by stirring in your sugar, it will go grainy and look like it's almost seized and been ruined, it's fine just go with it.  next you need to beat in your eggs and vanilla extract.  then fold in your sifted flour and salt
Roughly chop 3/4 of the cookies, bearing in mind 2 or 3 will get eaten by passing kids etc so I never have managed to use a whole pack, and I always save one for coffee while the brownies bake. Stir these through the brownie batter and put batter into prepared tin. 

I half roughly the remaining cookies and decorate the top with them and bake for 30 minutes.  And they come out looking a bit like this 

The insides still gooey and outsides just crisp but chewy to. 


Now my coffee has almost vanished and I am feeling a little less stressed so I think the day will end up to be not to bad after all :o) 

Wednesday 7 December 2011

Madeleines


I've had a tin for making Madeleines for a while now just not gotten around to them. Had it in my head that after hearing people rave over them that they must be hard or time consuming. How very wrong I was

I looked out Eric Lanlards book home bake and made 2 substitutes out of need as can't pop to shop with son home with ear infection. Anyway I'll give you my adapted version of ingredients and bracket what Eric used.

90 g unsalted butter, plus 2 tablespoons melted for greasing
90 g plain flour, plus extra for dusting
2tsp golden syrup (clear honey)
40g icing sugar
1tsp baking powder
2 eggs
1tsp orange extract (orange blossom water)

Preheat your oven to gas mark 4 160c/350f
Put butter and syrup in small pan to melt together carefully. Then put aside to cool.

Brush your Madeleine pan, or small cupcake tin maybe, with the small amount of melted butter. Then sift a small amount of flour over this and briefly turn upside down to shake off excess


Then take a large bowl and sift in your flour, icing sugar and baking powder together into it. Checking your butter mix is cool stir this into your flour mix. Then both your eggs and finally orange extract or flavouring of choice.


Leaving a lovely glossy slightly gloopy mix for want of a better word!

Spoon this into your prepared tin filling 2/3 to 3/4 full I very slightly overfilled mine but still worked.


Bake for 10 minutes until well risen and golden leave to cool in tin for a few minutes
before turning out onto a cooling rack.

When totally cool dust with icing sugar and enjoy with a cup of tea or coffee :-)


These were amazing, texture wise they are very soft and airy inside but with some substance, and the outside there was the thinnest of a crunch, just barely there.  My new favourite.  Start to finish probably took 25 minutes from started to measuring ingredients out to taking out of the oven, as well as taking photos. 

Sunday 4 December 2011

#fbcookieswap

last month I signed up for a wonderful cookie swap over at http://www.loveandoliveoil.com/2011/10/the-great-food-blogger-cookie-swap.html and earlier in the week I got my first parcel from Alison  over at http://hungrysquirrelcakes.wordpress.com/ Earlier in the week.  A beautifully packed parcel held delicious delights
The squirrel card made me smile and how can a brown paper package with ribbon not make anyone smile.  These were safely protected with miles of bubble wrap :o) and hidden inside was a zip lock bag of cookies, chocolate orange cookies to be precise.  There was just the right chocolate orange ratio.  Just a crisp thin outer layer and a soft interior.
I hid them from the boys as they were home Wednesday, one sick and one due to the strikes, and smugly ate one on the sly in the kitchen.  Delicious :o)  I shared the rest honest.  But can't wait to get hold of Alison's recipe for these.  Thanks for a wonderful batch of cookies Alison :o)


Friday 2 December 2011

Betsy's scotch pancakes

A few weeks ago I saw a book while out shopping Dan Lepards Short & Sweet .  I had heard many good things on twitter so decided after a flick through to buy the book. I have a few more of Dans books and his way of making bread works wonderfully. I am already a fan of his.

 What I usually do with a new cook book is find the most 'simple' recipe in the book and give that a go first.  Mainly because I have found if the simple recipe goes wrong then there usually isn't much hope for the rest of the book! So I spent some time reading through and deciding on the first thing to try and Betsy's Scotch pancakes were the choice I made with the help of my pancake mad 9 year old :o)

We halved the recipe as there were only 2 of us eating.

because I am not the most brilliant I can be first thing in the morning I started the measuring the night before and put the dry ingredients, after first sifting it all together, in a covered bowl.

in the morning I simply measured out my milk and beat my eggs. then add eggs to the dry mix and beat with most of the milk.  Keep a little milk back at first as you may not need it all. It should form a thick batter.

heat your pan with a little of your butter until it sizzles and then wipe excess out of pan with kitchen paper. Drop the batter into the pan in about 2 tablespoons worth of batter and wait until the first bubbles in the batter start to pop before flipping them over.  I found I needed the pan to be heated below medium but that of course will differ with each pan and your own stove.
To keep these warm as you cook the rest of the batch, lay a clean tea towel over a cooling rack and wrap them in the towel as you carry on cooking.

These come out thick and fluffy but not to dry and cloying as some can do. I have since made them with blueberries to and they went down very well with my 9 year old :o) For a first simple recipe it was a roaring success. So far I have cooked 6 or 7 things from the book and all have come out as they should and tasted great. Would recommend the book to anyone.  Plus I can see myself trying to get through most of the book.
Not a brilliant shot I admit, but it does show off the fluffy inside.  We ate ours simple spread with butter. Perfect for breakfast or afternoon tea :o)

Thursday 1 December 2011

Pavlova

I did a post about Pavlova over at Great British Baking club so if you would like to see how I make a pavlova like this go visit and discover a great baking website and some lovely people there to :o)