Monday 24 October 2011

profiteroles

Now the story of these goes back to my sons 9th birthday on the 5th.  We went to pizza hut and they presented him with a dessert of  profiteroles with choc sauce, big scoop of ice cream and a candle after he had eaten.  Well I commented while he had eaten that I hadn't made any in many many years. He said to me at the time that he didn't believe I could make them at home.  Challenge issued and I finally got around to making these yesterday. I adapted a recipe from the second Great British bake off book as I didn't want a full recipes worth as there were only 3 of us eating after all.

so I started off sifting 66 grams plain flour onto a sheet of baking paper

50g unsalted butter
pinch of salt
116 ml water
2 free-range eggs at room temperature, beaten well

in a medium saucepan place the water salt and butter and gently heat until the butter has melted.  Do not boil before the butter has melted because you do not want your water to evaporate.  Then bring liquids to the boil really fast, then tip the flour in all in one go.

remove pan from the heat and beat with a wooden spoon really fast.  This will look a bit strange but keep beating and have a little faith and the mix will turn into a thick heavy dough that forms a big ball and comes clean away from the sides of the pan.  Now we have to turn the heat on very low and gently cook the dough for 2 minutes beating the dough until it forms a smooth glossy ball.

tip this dough into a mixing bowl and let it cool
Patience is not my strong point so I flattened it against the sides of the bowl to cool.  It doesn't need to be stone cold just cool to the touch so the eggs don't cook in the heat of the dough so I did this to speed up cooling
Using an electric mixer add enough egg to make a very shiny and paste like dough, It should fall from the spoon with a light shake from a spoon.  Be careful as you may not need all of the egg and to much will mean it will spread rather than rise in the oven.  When your dough is ready you can either use straight away for profiteroles or eclairs, or cover tighter and use within 4 hours.

I chose to make profiteroles so preheated the oven to gas mark 6 and greased a couple of baking sheets, you could line them with baking paper to

fill a piping bag with a 1.5 cm plain nozzle and pipe mounds around 3 cm wide and 2 cm high leaving space between them to spread and grow
If there are any peaks dip your finger in water and just flatten them down gently.  you can give them an egg wash but mind you only get the tops or they stick to tray/paper.  Guess how I learnt ;o) I am really out of practice with the piping bag and wasn't much good to start with so this was pretty lip biting stuff but they came out OK,  I was happy enough

Bake in the oven for 15 minutes then reduce the oven temp to gas mark 4.  Quickly open the oven door and shut to release the steam and help oven drop it's temp fast and carry one baking for a further 5 minutes

Remove trays from the oven and make a small hole in the bottom of the choux bun and return to oven for last 3-4 minutes or until first and cool on a metal rack

I used a small end of a small teaspoon to make my holes
cooling, these look a bit pale but it was the light not the actual buns.

while these were cooling I got on with the chocolate sauce,  straight out of the book no faffing with

in a small pan put

100 g dark chocolate broken up
25g unsalted butter
2 tablespoon icing sugar
with 100 ml water. 

Bring up to the boil gently stirring frequently.  Keep going it will come together but won't get as thick as you think you would like it until you let it cool slightly. 

While sauce is cooling but staying warm,  whisk up double cream, icing sugar and vanilla extract to make Chantilly cream.  put this in a piping bag with a small piping nozzle


Just before serving fill the buns with cream through the hole you made and dip the tops into the sauce.  Drizzling any extras around the bowl and over the profiteroles.
 And an inside shot :o) All that yummy creaminess

These were really really rich, we had 4 each and to be honest 3 would of been ample.  The dark chocolate against the cream and pastry is a marriage made in heaven. Definitely a celebration dessert or impress your new boyfriend or in laws dessert :o)
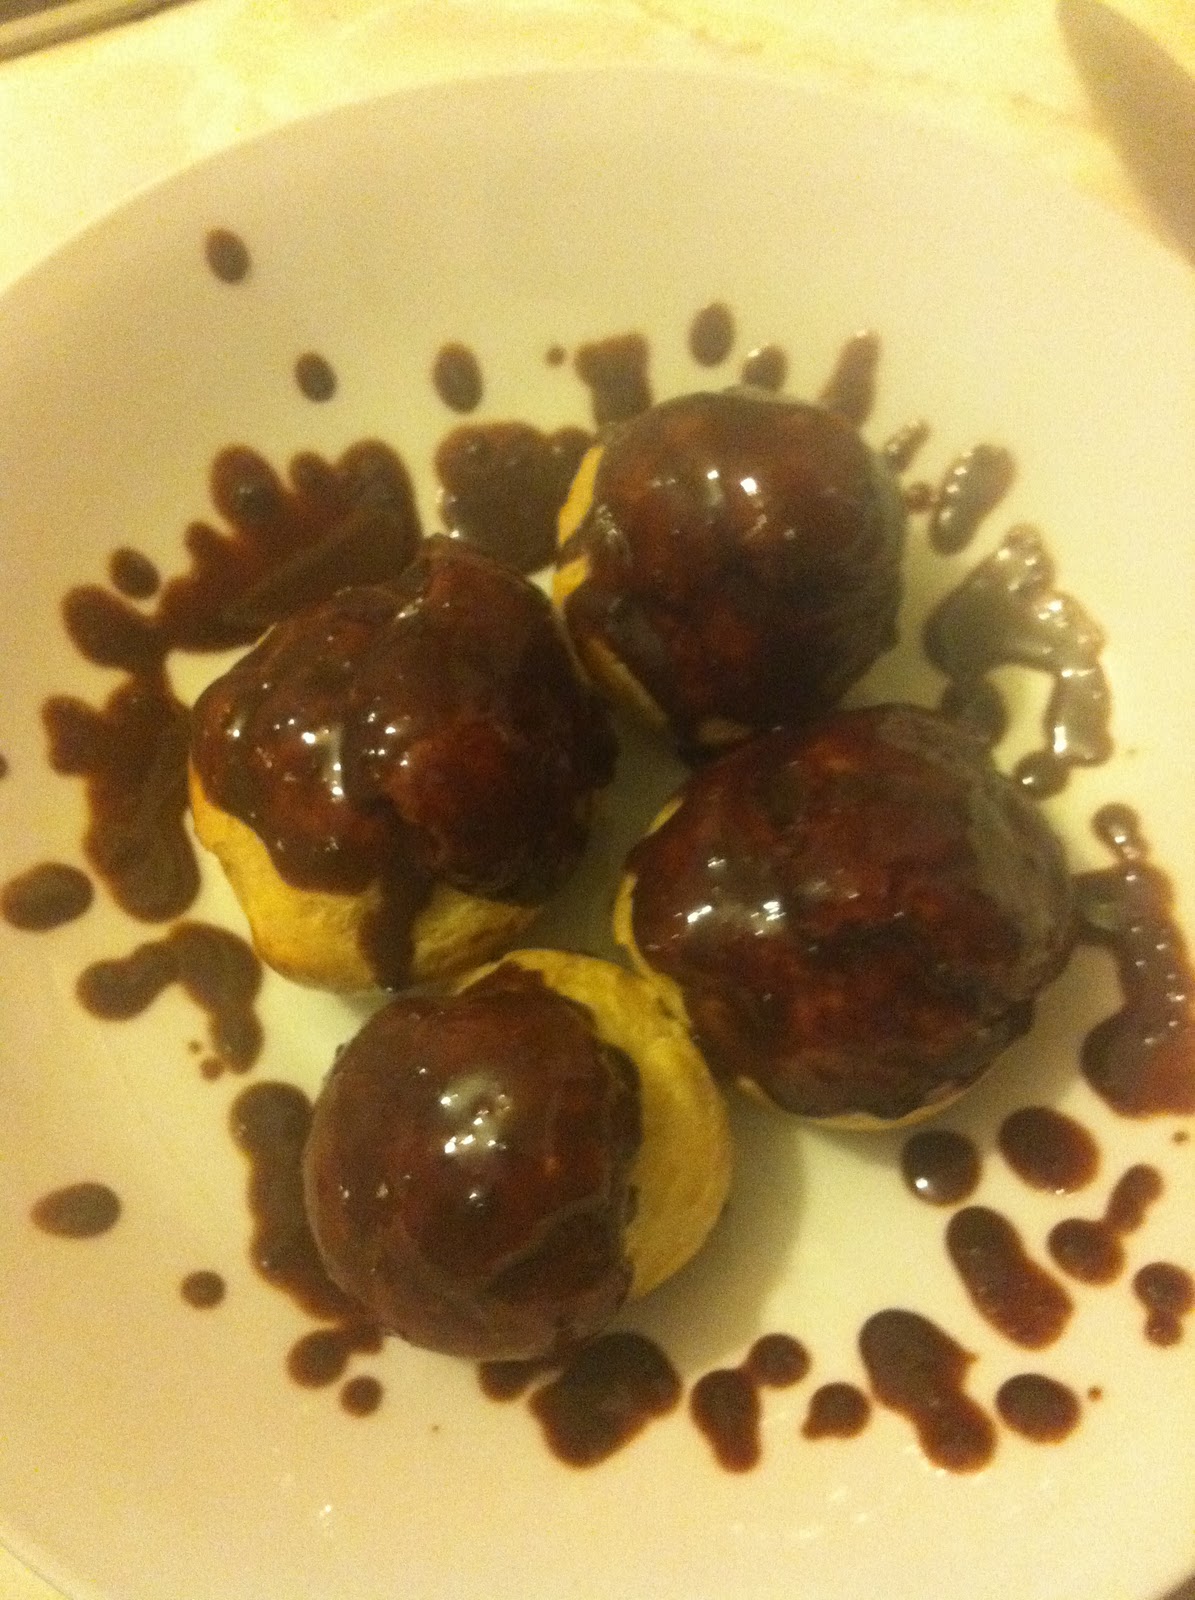
And this says it all.

Sunday 23 October 2011

Cherry meringue roulade

This was another one of Mary Berrys cakes for the weekly bake off challenge  some of us have been doing. It was supposed to be raspberry roulade but my local shop had no raspberries and not sure October best month for them anyway. So after a wander around the shop feeling a bit blank I cam upon the idea of using a tin of pie filling. Cherry pie filling. Yet again I have missed out the flaked almonds as specified on page 175 of Mary Berry 100 cakes and bakes books, as son doesn't like them,

This weeks was judged by Yasmin and you can see all the details and the results here and amazingly I won the star baker award this week!!!! So i proudly present


It was a surprisingly short list of ingredients for a really nice cake I felt
preheat oven to gas mark 7
line your swiss roll tin with baking paper
you will need
5 egg whites
275g caster sugar

for the filling
300 ml whipping or double cream
1/2 tin approx of red cherry pie filling

Whisk up your egg whites until they are very stiff, then add the sugar, slowly while still whisking, one teaspoon at a time. keep whisking until all is incorporated and mixture is very very stiff.

then put the egg white mix into your lined tin.
 and smooth down

At this point you could sprinkle on 50g flaked almonds if you liked. 
Place near top of your oven for 8 minutes until pale golden, then turn oven down to gas mark 3 and bake for a further 15 minutes.  At this point it had grown a lot and I was wondering how I was going to roll it. But it deflates after it comes out 

The recipe doesn't say to put icing sugar on the baking paper you have laid out ready to turn the roulade out onto but I found mine stuck slightly in places so lay out a piece of baking paper and dust with icing sugar! When the time is up take out roulade and then upturn it onto the prepared paper. Remove the paper from the top that lined the tin and be amazed at how much it shrinks.

While the roulade cools for about 10 minutes whisk up your double cream until it forms stiff peaks. at this point I took just under half the pie filling mix and ripples that through the cream.  Then spread this onto your roulade and roll it up like a swiss roll. roll baking paper around it and put in the fridge and keep chilled until needed.
before going in fridge and before ends were neatened up it looked like this

See what I mean by how some of the top stuck to paper and came off.  Use icing sugar next time is what I learnt from this.
A little later I trimmed the ends, which tasted great and dusted with icing sugar. Then let the boys at it after a final picture

This was a surprisingly easy and quick bake for something that people seem to think is hard. 

Thursday 20 October 2011

flapjacks

For years flapjacks did not want to work for me, they either turned out like hard rocks or fell to pieces and crumbled.  I finally found a recipe that worked and have had fun playing with it since with variations on flavours.  Today I made chocolate and coconut


125g butter, plus extra for greasing
125g light muscavado sugar
1 tablespoon golden syrup
175 g porridge oats or jumbo oats
50 g dessicated coconut
50 g roughly chopped dark chocolate

Start by preheating your oven 180C/160Cfan/gas mark 4 and grease a pan that's roughly 7X11 inches.  I use my brownie pan.

grab a biggish saucepan, I forgot this bit as usual and had to haul out a bowl to mix it in yet again. put in your butter, sugar and golden syrup and put over a low heat and let gently melt together stirring now and then.  Takes hardly any time.  While this melts I measure out the oats and coconut. pour the oats etc into the the melted butter mixture and stir thoroughly until all the oats are coated
 This needs to cool down a little so after it's mixed put it to one side and chop your chocolate roughly.  Then stir through the chocolate which will melt slightly in places  but will taste great afterwards.  When mixed empty mixture into your prepared pan and flatten down evenly.

Place  in oven for around 30 minutes.  I remember original recipe saying until golden brown and firm.  Firstly you can't see golden brown with this chocolate in and as for firm that would involve touching the mixture with your fingers.  DO  NOT under any circumstances go poking this with your fingers when you are testing it that chocolate BURNS, secondly it doesn't feel that firm either.  I tend to find it looks slightly darker round the edges and smells done if that makes sense? Just personal experience.

Still doesn't look thrilling but at this point the smell was driving me nuts,  I was really smelling the choc and coconut and hoping it tasted as good as it smelt. 

The other place I have gone wrong with flapjacks in the past was trying to cut them to early and take them out of the tin to early.  So I tend to leave them 10 minutes then cut them while still warm.  Then leave another 10 minutes or so before taking them out of the tin onto a cooling rack.  Still a slight bit crumbly but not ending up with piles of what looks like granola etc.
Finally after years I can make flapjacks.  And this variation tasted as good as they smelt thankfully :o)
I have made these in the past using nuts, glace cherries, raisins and even marshmallows instead of the coconut.  So go ahead and have a go and delight yourself and maybe your family with these.  I just know my boys are going to love me for these tonight ;o)

Monday 10 October 2011

bakewell tart traybake,

I had a little fun with this bake.  Found on page 96 of Merry Berrys 100 cakes and bakes
As usual things go missing or I find I don't always have the exact thing needed. In this case my tin was a little small but no problem.  Jam wise, I used what we had left over from the swiss roll. 

started off preheating oven to 180c/fan160c/gas4
for the pastry
175g plain flour
85g hard butter from the fridge

rub these together with your finger tips until it looks like a cross between breadcrumbs and crumble.  Then bind together with 1-2 tablespoons of cold water until it comes together in a ball leaving the bowl clean.
Reminds me of making shortcrust at school and having out hands checked to make sure it was only our fingertips coated in flour and not any on our palms.  Cardinal sin you know :o/

Roll out on a lightly floured board and line a 12 x 9 inch tin with the pastry.  Now as well as not having a tin big enough I had lost my rolling pin and had to use a wine bottle.  Rolling pin has since turned up.  This makes me happy as although I bought a new one my rolling pin is one I grew up with in our house so I feel it works better as more experienced and full of lovely feelings by now.  OK maybe not, but I feel better handling that one

bit of pressing down and was time to start with the sponge. recipe calls for
115 g softened butter
115g caster sugar
175g self raising flour
1level tsp baking powder
2 large eggs
2 tablespoons milk ( got mine out in advance so it was room temp so not to curdle sponge mix)
1/2 teaspoon almond extract (upped mine to 1 tsp as a few people said theirs wasn't as strong tasting as it could of been)

spread the pastry with 4 tablespoons of cherry jam or jam of your choice.

Put all your sponge mix ingredients into a bowl and mix together for 2 minutes.  I used an electric hand whisk for this job.  For a little extra I took 100g of roughly chopped dark plain chocolate and stirred this into the mix just before putting in the tin

As said previously, one of my sons has a slight aversion to nuts so the chocolate was sort of as a substitute idea.  It also meant I only sprinkled half the top of the sponge with flaked almonds 

After baking for 25 minutes, the sponge should be shrinking away from the edges of the tin and be springing back in centre when gently pushed, it was time to take the bake out of the oven.

Then I had to rush out to spend an afternoon with daughter, younger son and granddaughter.  Was probably for the best though as don't think this would of got to cool down before eating if I was left in house with it. 

The chocolate for us was a stroke of genius.  It really did lift the tart to another dimension with the dark chocolate lifting the tart sweet jam more into the limelight somehow.  

Fridays sky

After a busy day on Friday, I decided to walk down to the shops with younger son and buy a lottery ticket.  Plus a walk is never a bad idea with younger kids to help wear them out.  It turned out to be an amazing walk.  The sky had some amazing colours and clouds and a rainbow.  The chatter on the way down included rainbows, spectrums, war of the worlds, dinosaurs and a few other things.  Was lively but relaxed.  Took a few photos to
L said big cloud looked like a fish with legs at back instead of fins!
Remembering ROY.G.BIV to help remember the colours on a rainbow.
Was a fun walk and we didn't get rained on.  All the photos were taken within same 2 minutes so was interesting to turn and see all the different colours and shapes in one place.

Sunday 9 October 2011

carrot cake with mascarpone topping

This was the first weekly bake off challenge.  I am not going to publish all these recipes for these as think I might get in trouble from the publishers! But HERE is the link to the offical website for this cake.

Now This cake was delicious.  But it's not what I would class as a carrot cake.  For a start there are bananas in it. The texture for me was more muffiny.  And indeed it was made in a similar way with wet ingredients and dry mixed seperately then stirred together.  The cake batter was a really weird ugly looking mix, which looked really sloppy.  Turned out well though.

My older son has an aversion to most nuts.  He has stopped claiming to be allergic, which caused a panic at school once, and just says I don't like them these days.  So with him in mind I omitted the walnuts and subbed them for the same weight of golden raisins.  I left the topping plain vanilla with no bits in. Was brilliant.  Both boys raved over it.  Am not sure if it was because it was that brillliant or if because they were so shocked I had made a cake on a Monday!  All in all though was a very easy cake to make, a crowd pleaser to.  But in future if asked I am calling it banana and carrot cake as I feel the banana overpowers the carrot.
This was after it had cooled a bit out of the oven,  When it came out it was very domed and cracked and I thought it would look terrible iced.  But it calmed and looked flatter.
not a great pic as you can see phone shadow ;o/ but this is with the vanilla, mascarpone topping. This we would of happily eaten just on it's own.  After being in fridge overnight the texture of the topping was a lot better for the cake we felt. 
And a slice shot, colour is a slight bit off but it sort of shows the texture, dense but light at the same time.

roast butternut squash soup with chilli and ginger

This one was one of the lovely Lorraine Pascale recipes from her new series and new book.

One butternut squash around 800 g cut in half length ways and seeds removed
One clove garlic left in paper but smashed a bit
One onion chopped
Two tablespoons olive oil
50g of butter
One regular chilli
2cm chunk fresh ginger
900ml chicken stock
Half a lime
Splash tinned coconut milk
One sprig coriander
Salt and pepper to taste

First preheat oven to 220C/425F/Gas mark7.
Score your butternut squash halves and drizzle with half the olive oil and sprinkle with salt and pepper. Pop garlic in with the butternut squash and place in oven for 30 minutes or until flesh is soft when tested with a knife
While squash is in the oven take remaining olive oil and the butter and melt in a large pot. put in the onions and some seasoning and cook on a LOW heat for 20 minutes or so.  These onions should be meltingly soft with no bite.  Which is how my mum used to do them for hotdogs.  But she used to do them in microwave!
Colour is just slightly off here but they have all softened and sweetened.  I think the salt in there helps stop them burning and catching.  Stir occasionally and keep your heat low.  Takes time yes but I was only hanging around for the squash to roast.  Meanwhile I peeled and finely grated the ginger and got out the crushed chilli jar as had no fresh chillis.  I used just a pinch as had younger son eating with me.
When the squash is done take out from oven and let it cool a little to handle it.  Patience has never been my middle name so I managed to just avoid burning my fingers

Squeeze the roasted garlic out of it's paper and into the onion mixture.  Then scoop out the flesh of the butternut squash and put this in the pan to
It's not looking amazing at this point I must admit. Lorraine recommends turning oven off and putting soup bowls in warm oven to heat up.
Now to the pan you can add, ginger, chilli, and chicken or veg stock.  I used veg stock as we have a vegetarian in the house. Then simply bring it all up to the boil and turn it off. 
At this point it is smelling and tasting great.  I didn't need to adjust seasoning but you might if you try this after you have blended it.  At this stage the texture is a bit strange for soup but doesn't affect the taste. I blended it with my trusty stick blender.  Lorraine suggests a few squeezes of lime which might be great but we didn't try it.  I had my trusty kitchen helper who enthusiastically helped me dish up and put a few tablespoons of coconut milk into the soup bowls for me.
This soup surprised me.  I didn't expect such deep flavours.  You could taste everything in it.  Was a warm chilli heat. I wasn't convinced to start off with that coconut milk was going to work with this and wasn't to convinced at opening a tin just to drizzle on the soup.  My youngest convinced me otherwise and it just complimented the warm, autumnal tastes very well. I was also a little concerned that the spice heat might be a little to much for my son, but he was pretty happy with a tea towel as a make shift bib and trying to eat it fast as he could.  


chicken and mushroom pie

I am a great lover of books, all kinds of books.  I couldn't read a word until I was well over 7.  In fact I remember my teacher saying I would never read.  Then one day I picked up one of my Mums books and read it cover to cover understanding it all.  Since then I was hooked.  I love the library but I hate giving books back to library.  Some women buy shoes for me it's all about the books.  Cook books generally outnumber my other books. I tend to read and get ideas from cookbooks, but earlier in year decided to actually start following recipes.  I tend to follow baking recipes but improvise on others more.

One of my books I have bought this year was Ross Dobsons Grillhouse gastropub at home. I have made a few things out of here already and was impressed.  This week I decided with the cool weather starting a pie was what was needed. so chicken and mushroom pot pies on page 125 seemed to fit the bill perfectly.

All in all a very easy pie to make.  I went shopping and sure enough despite making a shopping list forgot something, a leek, so subbed for onion  and it was still fantastic.

500g mixed mushrooms ( I used forestiere ( something like that) and button mushrooms I had in fridge)
80g butter
1teaspoon finely chopped thyme leaves
1 clove garlic finely chopped
400 g skinless boneless chicken thighs cut in bit sized bits
1 leek, white part only halved lengthwise and chopped
35g plain flour
250ml chicken stock ( I used a knorr stock pot jelly thing)
250ml cream ( bought to small a pot so made up with milk and worked great)
5g chopped flat leaf parsley
1 sheet ready-rolled puff pastry
1 egg lightly beaten

big list yes but believe me when I say was worth it!

trim the stems from the mushrooms ( save the stems for when you make a soup) and roughly chop in big chunks, leave small ones whole.

heat half the butter in a large frying pan on a high heat.  When sizzling add mushrooms, thyme and garlic, shaking the pan for around 5 mins or until mushrooms soften and start turning brown.


It's at this point I am forcing myself not to eat all the mushrooms because I love them.  Remove mushrooms when they get to this stage and add rest of the butter and when sizzling, add half the chicken for 2-3 minutes a side or until golden all over.  Remove with slotted spoon and place with mushrooms and repeat with rest of chicken. At this point you need to reduce the heat to medium and add the leek, onion like me if you forgot it or don;t have it/like it, and stir scraping the bottom of the pan and stirring for a few minutes to remove any bits from bottom of the pan. Then you can return mushrooms and chicken to the pan with any juices and stir for a few minutes.

 Then we get to the point it could look as if it's all going wrong and kids start asking 'where's my tea?' sprinkle in the flour and stir until it all starts coming together and kind of looks clumpy.  Add the stock gradually, stirring until thick and well combined.  Think of a white sauce but using stock instead of milk. Then you can stir in the cream, or cream and milk, and parsley and reduce the heat to low. Just for 2-3 minutes or until thickened.  Taste and season if you feel it needs it.  At this point we were deciding if we really wanted to wait long enough to make the mixture into a pie!
 It's not the most interesting or exciting looking filling but it is amazing taste wise. at this point you can spoon it into 4 individual pie ramekins or one big pie dish.  I took half the mixture and put in a small pie dish as there were just 2 of us eating that night.  Leave it to go cool.
 Preheat your oven to 220C/425F/gas7, and from pastry cut out lids slightly larger than your pie.  after placing pastry over brush with beaten egg.  Now I got lazy and just tucked pastry in and although it looks black in the photo it didn't quite burn but was to overcooked.  So next time will be neater. I cooked ours for almost 30 minutes, until the pastry is golden and puffed and the filling is bubbling.

 I served it simply with some new potatoes and steamed broccoli.  My 9 year old gave it a million out of 10 ;o)  We are pie lovers in our house and home made is always better than shop bought


weekly bake off

A couple of weeks ago there was much excitement on Twitter.  Amy, had announced a weekly bake off idea using one of  Mary Berrys books.  Being easily excited and loving to cook I took this as a brilliant idea to start cooking more.  It turned out to me the most amazing thing for me because my flagging cooking mojo erupted back into life :o)

I am going to attempt to blog most of my new attempts, baking, and some old favourites.  Now and again I might deviate and show you other things that make me smile, maybe even annoy if you are unlucky ;o) I also love to craft in various forms so it won't all be cooking.  I am a bit behind on things I want to blog from past week though so next few things will be cooking.

Jules xx

Wednesday 5 October 2011

Swiss Roll

Today is my youngests 9th Birthday.  Both of us have been home all week with ear infections and much yuckyness.  Usually I cook the kids the cake of their choice and have it ready for their Birthdays.  This year however Luke decided he wanted to help and he wanted a swiss roll. Having joined the weekly bake off on twitter last week, more on that in next post, we decided to use Mary Berrys version in her 100 cakes and bakes book, page 8 and then adapted ours to have cream in like the one on page 11 just to make things interesting. Add to the fun one 9 year old boy full of life in short bursts and was an interesting cake but luckily a quick bake.

Cake tin needed: 33 x23 (13 x 9 inch)swiss roll tin
4 large eggs
100g (4oz) caster sugar
100g (4oz) self raising flour

for the filling 4 tsbsp strawberry or rasperry jam ( we used smooth bit less mixed fruit jam)

preheat oven 220 C/fan 200 C/gas 7

Grease the tin and line with non stick baking parchment
Whisk the eggs together with the sugar until the mix is light and frothy and leaves a trail when the whisk is lifted out


Then you need to sift the flour onto the egg mixture while GENTLY folding it in with a spactula.  At this point I had an assistant who was very enthisiastic but we managed to get coordinated and get all the flour in and keep the air in
After  gently but quickly folding the flour into the eggs it was time to pour the mix into the prepared tin, gently easing the mix into the corners before placing in the oven gently. 
photo is a bit blurred but trying to work fast here and keeping son quiet.  Years ago my Mum would make swiss rolls and my daughter who was around 4 or 5 would go in singing or stamping around her suspended floored kitchen and we would end up with very flat swiss rools! So keeping son quiet we timed off 10 minutes.  Preparing a new sheet of baking paper sprinkled with more caster sugar while waiting. 

The swiss roll sponge is ready when it is shrinking away from the edges of the tin and springy in the centre. Then time to be bold and swiftly upturn the sponge onto your sugared sheet and peel off paper from the back of the sponge.  Trim the edges of the cake which you can feed the impatient kids or have with your cup of coffee while the cake cools , and about an inch in from one short end score a line all the way along but not all the way through the sponge.
minus score as it was on other end
Now being we deviated from the first recipe and chose to add cream what you are supposed to do is roll the cake up using that scored edge as the first fold and leave it wrapped up with the paper until it's completely cool.  If however you have an excited child happen you might accidently miss this line but you can still carry on honest!!

When cool unroll your sponge and spread the jam over the sponge,  we also opted to fill with some whipped cream which worked fantastically with the slightly tart jam.


proof is in the pudding and this went down amazingly well :o)  Need a sharper knife to cut though.  This cake was really easy to make even with 'help' fairly quick and one I can see myself doing quite often for family tea times etc